Vintage Mac Virtual Machine

This article is the third in a multi-part series related to the vintage Macintosh computers of the late 1980s, and why old software needn’t die, even if it is abandoned by its creators. ( 1 | 2 | 3 | Vintage Macintosh Resources )

[a work in progress…]

Released in 1986, the original Macintosh Plus could execute 700,000 instructions per second, or 0.7 MIPS (Million Instructions Per Second). That almost sounds fast until you compare it to my 7 year old iPhone 5, which runs at 20,000 MIPS or 20 Billion Instructions Per Second. My HP laptop has an 8 processor 1.8 GHz Intel i7 CPU running at around 54 BIPS (maxes out at 61 BIPS).

Okay, a lot of numbers. Point is, it’s not remotely taxing a contemporary computer (even a tiny computer like a Raspberry Pi) to emulate a vintage Macintosh. In fact, the emulator has to deliberately delay execution of machine instructions to run slow enough not to alter the behaviour of the emulated Mac.

Okay, I assume you’re reading this because you have some interest in emulating a vintage Mac on your own computer. I’ll describe below how to do this using the Mini vMac emulator, created as part of Paul C. Pratt’s Gryphel Project.

Requirements

That original Mac Plus had a whopping 1MB of RAM (Random Access Memory), upgradable to 4MB. It also had 128K of ROM (Read Only Memory) that contained all the core software that made it a Macintosh.

In order to open a Macintosh Virtual Machine (i.e., an application that emulates an early Macintosh), you’ll need

  • a customised executable (or “binary”) of the Mini vMac application, usually named “minivmac”, and
  • a ROM (Read-Only Memory) file corresponding to the specific Macintosh model you are emulating

Also important to note:

  • the Mini vMac executable and the Mac ROM file must both be in the same directory
  • you must have the right ROM for the Mac model you’re emulating, and it must be named correctly (see table below)

Fortunately, if Mini vMac starts up and can’t find the ROM file the error message will tell you the name of the ROM file it’s expecting.

The Mini vMac project hosts a Mac68k page listing all the Macintosh models and their corresponding ROM file names. I’ve summarised the ROM files required for each model below:

ModelROM Filename
Mac 128KMac128K.ROM
Mac 512KMac128K.ROM
Mac 512KevMac.ROM
Mac PlusvMac.ROM
Mac SEMacSE.ROM
Mac SE FDHDSEFDHD.ROM
Mac ClassicClassic.ROM
Mac IIMacIIx.ROM

Getting Mini vMac

Rather than me reiterate the voluminous documentation that Mini vMac’s author has accomplished, you can find Mini vMac resources directly from the source:

There are also more Mini vMac links on the Vintage Macintosh Resources page.

Getting a Mac ROM

The contents of the Mac ROMs are copyright Apple Computer, so it’s illegal in some countries to distribute them as files. I’ll just point you at where you can find one (or a collection of them):

  • Download vmac.rom (139K) on sites.google.com. The site also contains information about Mini vMac and links to various sizes of blank Mac disks
  • Download Macintosh ROM Archive (52.5MB) from the Internet Archive
  • Download Macintosh ROMs (5.6MB) from Macintosh-ROMs on github
  • Download Old_World_Mac_Roms (49MB) from the All Macintosh Roms page at the Macintosh Repository

Starting Up

Once you have an executable and a ROM, place them in the same directory and start the executable. I generally work on a Linux machine so I built some executables for Linux. On Mac OS X you’d put the minivmac application in the Applications directory, along with the ROM file.

Once the emulator has started you’ll see the Mac icon waiting for a startup disk:
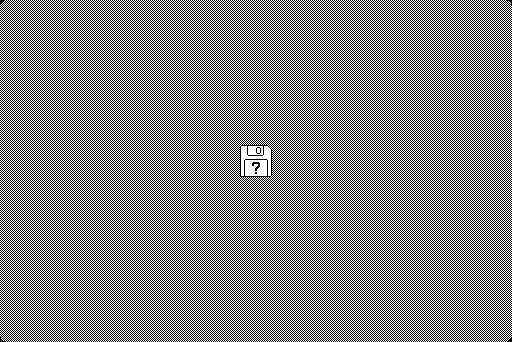
Waiting for a startup disk…

You then drag a Mac startup disk file (a .dsk or *.img file containing a System Folder) onto the window to start the Mac. If the disk contained a System Folder and things are successfully starting up, you’ll briefly see the happy Mac icon:
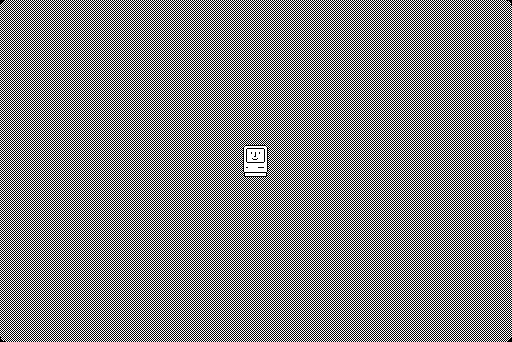
The Mac is starting up…

followed by the Welcome to Macintosh window:

Success!

…and then finally the Mac desktop:

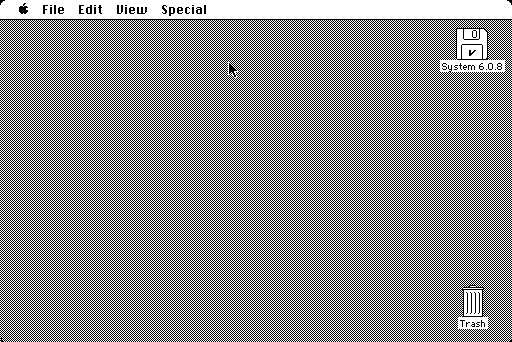
The Macintosh System 6 Desktop

Since we’re doing screenshots, to safely close down your Mini vMac session, select the Shutdown item from the Special menu. You’ll see:
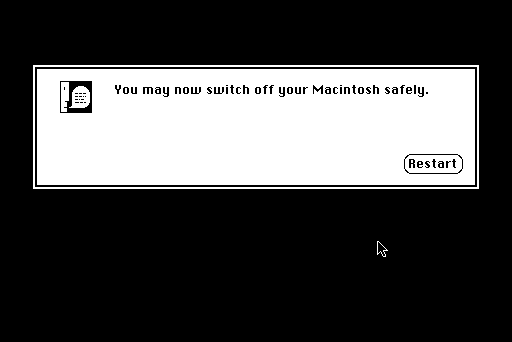
…and then you can close the window.

The above screenshots are from that originally-sized 512 by 342 pixel Mac SE screen, the way things were in 1986. If that seems a bit cramped, it’s possible to modify the screen size. I generally run 1200 x 900 in full colour, as on a Macintosh II with 8MB of memory. But sometimes I like that tiny Mac SE window too.

The mini vMac project provides open source code that allows you to compile the minivmac application using differing command line options. It’s these options that permit you to select things like target operating system, model of Mac to emulate, screen size, etc.

Next Steps

I ended up downloading the source code of the project and repeatedly generating minivmac binaries for differing configurations, then renaming the resulting binary to a name corresponding to the configuration. That way I could try out a Mac SE with the original 512 x 342 pixel screen, or a 1024 x 800 pixel Mac SE FDHD, or a colour Mac II. There’s no magic here.

I noted that the Basilisk emulator has a Preferences screen to alter the configuration of the emulation. It occurred to me that I could make a HyperCard stack to do the same thing for Mini vMac. And I did. I’ll cover that next time.

[This article was written in 2019 using MacWrite 4.6 on Macintosh System version 7.5]
Facebooktwitterpinteresttumblr

The Skull Box

This article is the second in a multi-part series related to the vintage Macintosh computers of the late 1980s, about a HyperCard stack resurrected in 2019 from the memory of one made way back in 1990.
(
1 | 2 | 3 | Vintage Macintosh Resources )

My work partner Jerry and I had developed a habit of passing paper notes back and forth during our sometimes interminable team meetings.

Jerry had a very dry sense of humor, and after we’d been sitting in one of these meetings for a very long time he passed me a slip of paper with a small cartoon he’d drawn of eight skulls in a chocolate box, his commentary on our mutual plight.

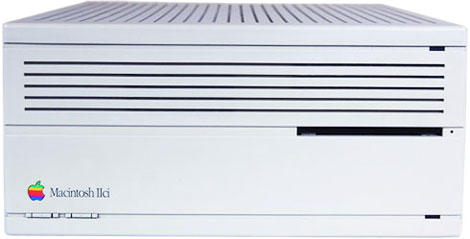
Macintosh IIci
Macintosh IIci

This was circa 1990. Jerry’s job was to extract data from a large university database; my job was to process that data using what was at that time the most powerful desktop computer we could find: a Macintosh IIci with 8MB of RAM . The base price of one of these in today’s dollars would be about US$13,000, this for a computer that ran 6.3 MIPS (millions of instructions per second). By comparison, my 2013 iPhone 5s (which I purchased a few years ago for $265) runs at 20,500 MIPS. That’s about 3000 times faster for a computer that is 2% of the cost. Nowadays we of course take this for granted, Moore’s Law and all that…

Jerry was using COBOL to export data from the university’s “student master file”, extracting large (25MB!) text files where each student’s record was a 640 character wide line of columnated data that captured everything the university knew of their personal information, the classes they were taking, and their grades. There was actually only one student master file (the database itself), and it was changing constantly, so the university captured snapshots of the file five times per semester.

I processed the data using 4th Dimension, a Mac relational database. It had a built-in programming language that I’d extended with a scriptable macro language. This was used to perform searches and generate indexes from the data Jerry supplied. I’d start a script on Friday as I left for the weekend and the Mac would chug away to generate about 450 Excel spreadsheets, finishing up sometime on Sunday afternoon. Nowadays that same processing would take less than a few minutes.

…and then came HyperCard

I’d been working on Macs almost since the first model came out in 1984. One of the things I was most enthusiastic about was a software program called HyperCard, which was distributed along with every Macintosh, as free software.

It’s a bit hard to describe the impact of HyperCard to those who haven’t seen or used it. HyperCard combined a graphics program, an object-oriented database, and software development environment in such a way that almost anyone could create their own applications, called stacks (following the metaphor of a stack of 3×5 note cards), enabling non-programmers to create software applications that were only limited by their creator’s imaginations (well, and the limitations of the computers at that time). People made their own recipe catalogs, address books, databases, animation stacks, tools to help them with all manner of professional, academic and hobbyist needs.

Creating the Skull Box Stack

That evening I started work on the HyperCard stack.

The Chocolate Box

From Jerry’s sketch I drew an empty chocolate box, then created a new button and set its Style as Transparent. For the button I created a new icon to look like Jerry’s skull drawing. I made seven more copies of that button and placed them inside the chocolate box. This all within HyperCard.

The Skull Icon

I made a small handle icon and used that on a large Rectangle-style button as the lid of the chocolate box. I wanted to have the lid fly off when clicked on, then if a skull was clicked on it would bounce around on the screen. This meant that the HyperTalk script for animating the lid and the script to animate the skulls could be similar, apart from the bouncing.

The scripting was a bit trickier than I’d thought, but I delivered the finished stack to Jerry the next day. On a floppy disk.

While it’s certainly possible to do something like this nowadays as a web page with some JavaScript, the graphics application and web development prerequisites and the ability to upload and host a page are beyond the skills of most non-programmers, or at least what most non-programmers would ever bother to do… too much trouble.

By comparison, HyperCard allowed me to do this in one evening in an environment that melded both graphic tools and a simple, English-like programming language. HyperCard was admittedly more limited than a full-colour graphics application and a web development environment, but those limitations actually enabled it to be used by anyone. And it was fun.

Download the SkullBox Stack

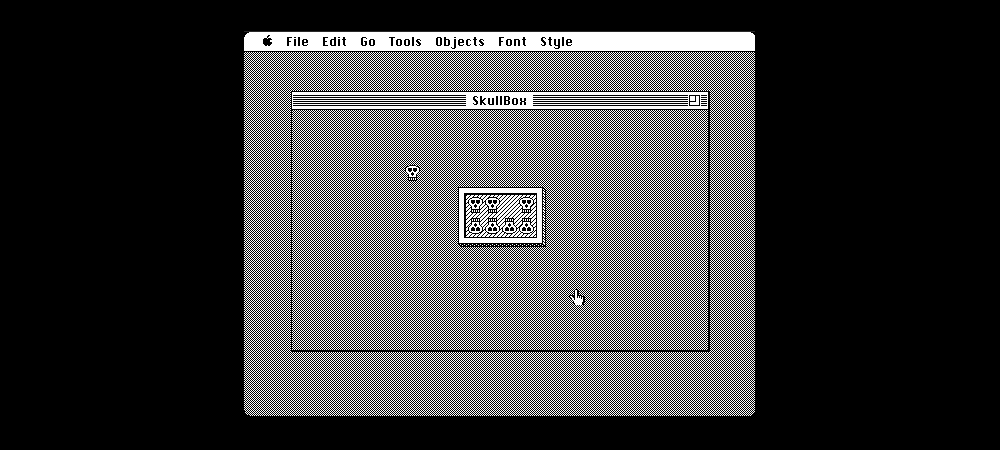
The images posted here aren’t from that 1989 stack, which is sadly long lost to the floppy disks of history. Last week I used HyperCard and the vintage Macintosh emulator Mini vMac to recreate that 1989 SkullBox stack (from memory, i.e., my memory), with a few improvements. If you have a vintage Mac emulator available you can download a floppy disk file and try it out for yourself:

  • Download SkullBox stack (disk image file, 131K)
  • Download SkullBox stack, HyperCard 2.3.5, System 6.0.8, utilities (bootable disk image file, 10.5MB)

The first download is a disk image containing only the SkullBox stack. The second download is a bootable disk and contains System 6.0.8 and a copy of HyperCard 2.3.5 so it can be used to start up a Mac emulator as well as run the SkullBox stack. You can even make your own stacks.

This article was composed using MacWrite 4.6 on an emulated Mac SE. Next time I’ll describe how to set up your own Mini vMac emulator.

Previous article: HyperCard Lives!

  • † interestingly, the developer of 4th Dimension, Laurent Ribardière, went on to develop Wakanda, a JavaScript platform to develop and run web or mobile apps. 4D is still available in 2019.
  • ‡ *.img or *.dsk files can be drag-and-dropped onto an open Mini vMac window to be mounted as floppy disks. They can also be double-clicked on Mac OS X and Linux to mount as read-only disks. Linux only seems to recognise the *.img file extension (as application/octet-stream), not *.dsk. But of course you’ll need a vintage Mac emulator to actually open a HyperCard stack.
Facebooktwitterpinteresttumblr

HyperCard Lives!

This article is the first in a multi-part series related to the vintage Macintosh computers of the late 1980s, and why old software needn’t die, even if it is abandoned by its creators. ( 1 | 2 | 3 | Vintage Macintosh Resources )

I first used HyperCard in 1987, the year it was released. I last used HyperCard yesterday.

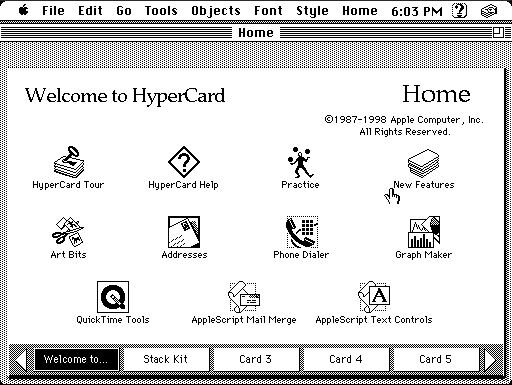
HyperCard in 2019: same as in 1989!

But isn’t Hypercard dead?

In the late 80s HyperCard was something to get excited about. It seemed at the time the avant-garde of computing. Perhaps it was.

HyperCard brings back a lot of memories. I remember going to a party at Amanda Goodenough’s house in the Santa Cruz hills to celebrate the success of her HyperCard storybook stacks (e.g., Inigo Gets Out). I remember meeting Todd Rundgren — one of my musical heroes — at a HyperCard conference in San Francisco, and realising I didn’t like him so much in person. HyperCard’s creator, Bill Atkinson, was the real rock star.

What was/is HyperCard? There’ve been many articles over the years; I won’t attempt to write Yet Another History. Bill Atkinson described it as programming for the rest of us, and he delivered on that promise. The rest of us included school teachers, musicians, librarians, botanists, kids. Really, anybody. Think about it. Has anything done that since? [Answer: No, not even close.]

But Apple never really knew what to do with HyperCard. Its last release was in 1998, and was finally killed off by Steve Jobs as an Apple product in 2004. But it had long languished from its heyday.

And then I didn’t think about HyperCard so much and got involved with the Web.

What was so special?

Over the years there’s been various HyperCard offshoots and derivatives (some more functional than others), but none that exactly captured that initial excitement, on a black & white 512 x 342 pixel screen. Why is that?

Part of the answer was in the limitations inherent in that tiny black & white screen and the lack of any networked connection to the outside world. Really.

The other part of the answer may be understood better by looking at the typical experience of using computers today, as well as those small computers we carry around in our pockets. That experience is exceedingly dynamic, every application and icon bright-coloured, blinking, flashing, trying desperately to get our attention. Even if they’re not making any noise, our computers are screaming at us.

If I click three times quickly on my iPhone’s button (if the setting is enabled) it converts the phone from full colour to greyscale. It’s quite an interesting experience. I don’t notice the flashing icons quite so much. I feel a bit calmer, more focused, more able to actually use the tool to get my work done. Just like in a casino, fonts, colours, shapes, movement, all are used to grab attention.

The other thing I notice about my desktop computers, laptops and phone, is that they’re always bothering me about upgrades. Are upgrades really so important? Do I need to be pestered constantly, need to sit while a Windows 10 computer or a Firefox browser stops me from getting my work done while it decides to upgrade, download, restart? Who is in charge here anyway?

Okay, enough of the rant. Point is, when you turned on a Macintosh in 1989 it was, by comparison, like entering a monastery. [Okay, maybe a monastery with a small cooling fan.] You sat in front of the machine and did some work. There were no distractions — at least not from the computer. It did what you wanted it to do. You had control. A bit like a toaster. Or maybe a bicycle…

I recently read an article by Ian Bogost in The Atlantic Monthly, where he describes his experience working on a 30-Year-Old Computer as “awesome”. I couldn’t agree more.

Part of what Bogost relates is actually about “empowerment”, which is curiously also one of the buzzwords bandied about when HyperCard was first released. Here’s the last paragraph from his article:

“As I flick off the power switch on the back of the Macintosh, the whine retreats in a gentle diminuendo, until it finally gives way to silence. I have accomplished a feat that is no longer possible: My computing session has ended.”

In this case the empowerment was the result of less is more: he’d taken control back from his computer. It somehow seems strange that we might even consider that remarkable, but those in the arts well understand that limitation can be a key to success. Yes, that 512 x 342 black & white screen was a limitation, as was the complete lack of connectivity. But some really great art has been done in ink on white paper.

Krazy Kat, by George Herriman

Bill Atkinson remarked that had he developed HyperCard at a network-focused company like Sun Microsystems rather than at Apple, it would have likely become the first web browser. While the ramifications of that alternate reality would have truly altered the world we live in (and Bill is I think too gentle a personality to have survived the browser wars against the likes of Marc Andreessen), it’s also a poignant reminder of that quieter, non-networked, toaster-ish world we left behind. That perhaps that quieter, disconnected world of MacWrite and HyperCard was a boon.

I’m not so much of a Luddite as to want to go back, but remembering the quiet and the focus of a computer that doesn’t constantly do what it wants rather than what you want might help us all regain some of that lost empowerment.

And while I doubt too many people will actually take this advice, you still can turn off the colour, turn off the networking, and actually use a computer as a tool to get some work done. It’s easy.

In the next post I’ll talk about another article in The Atlantic, about a writer using MacWrite 4.5. I’ll also describe how I’ve been using HyperCard again in 2019, 32 years after it was first released. And yes, creating new HyperCard stacks…

Facebooktwitterpinteresttumblr